Making a Communion Dress from a Wedding Dress


So a friend of mine, has been watching me make all the fun things from my wedding dress. She came to me with a project for her wedding dress. Her oldest daughter is about to have her 1st Communion and really wanted a one of a kind dress, and heirloom for the rest of the family. So no pressure right.
The first couple steps are the same as my past wedding dress projects. With taking the dress apart and washing the fabric and lace. If you want to see more of this, please checkout the blog post.
Cutting out pattern
Once everything is washed and dry, it time to cut the pattern out. I went thru my pattern stash, and grabbed my favorite princess dress pattern. I decided on this pattern, (link here), as I know the pattern and understand where I can make changes if needed.
The first step was to make a mock up of the top of the dress. I did this, as I was trying to figuring the best way to make the skirt for this dress from the wedding dress skirt. There is always a couple ways to make a skirt for a dress and the add complexity of taking a adult skirt with a train and matching that to a child size with no train, is the part I needed to get right.
I did attempt to measure out the skirt, however with space limitations and the weight of a full wedding dress skirt, getting a accurate measurement is difficult, and this is not a project where I can just go get more fabric.

Once the mock up top was cut out, and sewn together. I pinned the mock up to the skirt where I wanted it and thought it would line up but. Which gave me a huge sigh of relief, as my Plan A was going to be the very best option to make the skirt potion of the dress and provide me with enough fabric for the top and future projects.
With everything finally planned out, its time to cut out the actual dress. So I took apart the wedding dress skirt, where I need to cut out the new dress. As part of the prep work, the bottom of the skirt lace overlay was picked of the organza about 2 inches more then the seam. Measured from the bottom hem to the where the new waist seam will be, and marked it. Repeated that a few times along the whole length of the waist seam of the skirt, so there is a enough reference points to draw the waist seam onto the wedding dress skirt.
With the waist seam marked, and triple checked. Taking a deep breath and cut the skirt pieces out.
The rest of the pattern pieces were pinned on the wedding dress's skirt and cut out. With the cap sleeves, an extra piece of the lace trim cut out as will to add over top the satin sleeve. With every piece of this wedding dress, there is satin, fine tulle and organza overlay, which I pinned all three layers together and cut out at the same time. When removing the pattern pieces, I repined the layers, to keep everything together till sewing. I was only able to do this, as the fabric were already stacked on the dress, and there was nothing needing to line up.
I also cut the lining for the dress top with some white quilting cotton I had leftover from a different project. I choose the quilting cotton, as it will be comfortable to wear.
Sewing

Once all the pattern pieces were cut out, its finally time to sew everything together. Starting with the pattern pieces for the top potion, that has the 3 layers of fabric, carefully pinned together. I edge stitched along all the sides, to marry all three fabrics into one, without any of them moving.
I then sewed the top and lining pieces together following the instructions from the pattern. At this point, I also sewed the tie straps into the dress. With an extra stitch added on the seam allowance, to reinforce the ties to the dress. The only thing I alter was adding a invisible zipper, instead of using button closures the pattern uses. I prefer to use the zipper, as I like the finished look more. I also sew the zipper in place till 2 inched from the bottom of the top, so I can put the skirt onto the dress still, and don't need to do the whole zipper at once. I found this makes finishing this skirt a lot easier, with all the added tulle.
The skirt pieces were next to get ready to added to the dress. The skirt is made from those 3 layers of fabric, and they each needed the back seam to sewn. Since the skirt for this dress is made from the front panel of the wedding dress, there is only the one back seam. The satin fabric and tulle layers just needed to have the 2 sides lined up, and sew the previous seams together. However I left the top 2 inches un-stitched, so I can sew the zipper in later. The organza needed to be French seam together. So when I cut the layer out of the dress, I left the previous french seam on this side cute line, and cut right one the edge. This prevent any chance of fraying from the organza, which thankfully it was not a heavily fraying type anyways. However after the French seam was done, I then had to stitch down the lace edges, that were picked off before the cutting process. This over lapping, help to blend the seam into the dress more. If you were too look really close on almost every lace overlay item, (unless its fast fashion production) there will some blending at seams, or where ends of lace meet. It helps to give a better overall appearance to the item.
With all three layers of the skirt ready and a quick edge stitching to the very top to hold all the layers together. I pinned the skirt to the main fabric of the top, and not the lining. Sewing all 2 sides together, from edge to edge at a 1/2" seam allowance. Once that is all sewn in, I will then finish sewing the invisible zipper in place, for the main fabric.
Lining
For the lining of this skirt, I decided to use the lining from the wedding dress, instead of making one from scratch. I started by removing the top layer of tulle, and taking out the side seams. The side seams were removed, as I only needed half the lining layer from the dress, so once separated, I sewed the same seam back together with just the one piece.
Then measuring from the hem, I cut the lining one inch shorter then the main fabric, and sewed the removed lining layer, back onto the lining, to give it the needed fluff.
With the lining prepped, it was time to sew it into the dress. attaching first with pins the whole way around the waist seam, on the lining layer only. Then repeating the same process from sewing the main skirt on, and finishing the zipper for this side
Finishing Details
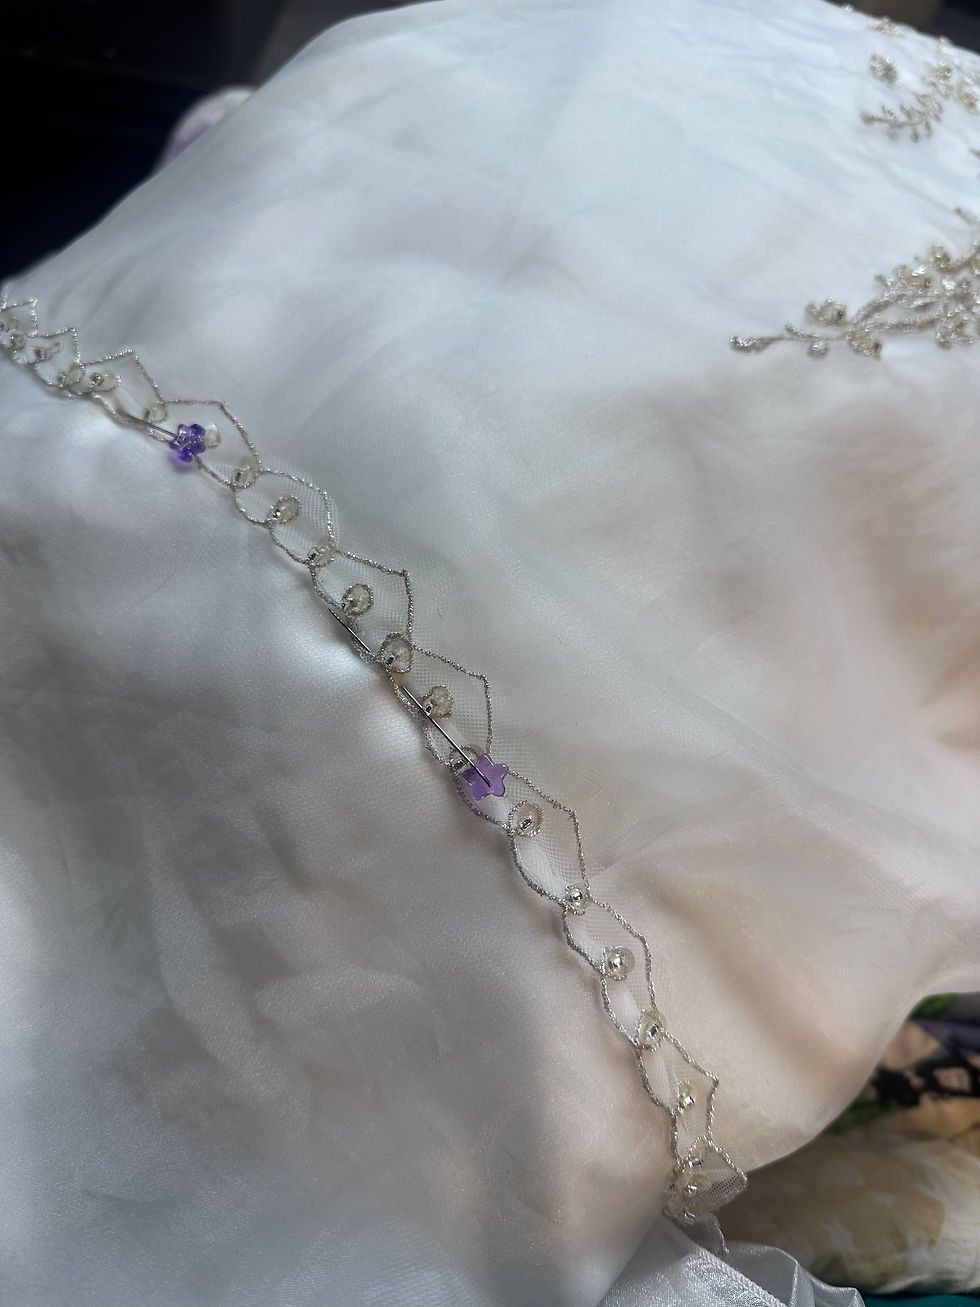
The most exciting part of every project, the final details.
For this dress, I decided to trim the very edge of the wedding dress details, and add that to the waist seam. I flipped the detail over, as this way it looks like interlocking hearts. This was all sewn into place with handing stitching. Hand stitching here, allows me to only stitch thru the very most top layer of fabric, keep the fine details protected and have the trim lay exactly where I like it.

The other details I decided to add was at the back of the dress, with some of the lace details from the dress near the zipper.
This was needed, as the organza was quite right in that spot.
I made the decision to add some details here and cover the issue. The option was take apart the dress, and hope that resewing would fix the issue. Which could fix the issue, or make it worse. So hand sewing these details, seemed to be the safer option
With all the hand sewing done, the only thing left to do, was to have one very special little girl try the dress on and enjoy!!


Comments