Wedding Dress Quilt
- Jennifer Herron
- Mar 1
- 13 min read

This quilt was made from both my dresses, and is always going to be super special to me.
I decided during the planning and designing stage, I wanted to it all. Since I always regret not doing something in projects, I wanted no regrets.
Going to start saying, that I don't believe in anyway, I can convey the amount of hours this quilt took to make. There is simply just hours spent at the sewing machine, ironing, etc.
I will try and share every detail, and design choice made. If after reading this, you feel like i missed something, let me know. There is a chance I have missed something.
Designing

Every quilt starts with at least some planning. This wedding dress quilt needed some detailed planning. I even colour coded the plan a little bit.
With most quilts, you decided on the pattern and then get the fabric. This quilt, I had the fabric and made the plan knowing how much fabric i could use. So I had to measure what i had left of trims so I had enough, if not adjust where i could use it. With the satin fabric, some I had less of, and had to decide where I wanted it used most/first.
Some details in the plan were more of a loose idea, that would be decided when I got to that part. So I could decide how best to make the idea happen with materials left.
Then there was ideas, that were made on the spot, based on how the quilt was coming together, materials, etc
This plan also included a cut list. Which is a least of fabric sizes needed, that need to be cut out.
First Steps

The first few steps in the quilt are exciting, as its new project energy. However they can be very tedious and boring too. With this project, the first steps were to cut out the main pieces and fabric needed. The big 2ft by 2ft square in the center, all the way to the 3" blocks needed. However this quilt is not made of quilting cotton fabric, I had to iron interfacing onto every piece of fabric.
So for the massive 2ft by 2ft square the steps were.
1) I had to cut interfacing slightly larger, for this block an 1 inch bigger
2) Select and iron the fabric chosen
3) Iron on the interfacing, without dragging the iron.
4) Cut the fabric to size required.
This whole process was repeated for every piece of fabric in the quilt, except the backing and the hearts.
The process was also done on the sewn in lace fabric parts of the quilt. With the added steps of cutting the lace to the same size as the fabric, and then edge stitching around the whole thing, so the lace was attached the fabric.
In case you were wondering, I used around 10meters of interfacing for this project.
Building blocks
Just as a note before getting started. All seams were ironed opened, to reduce bulk on any one seam.
Also that all ironing, was done in low heat, with a cotton piece of fabric covering any delicate materials like the lace.

After prepping everything, it was fully time to seat down at the sewing machine.
The first thing I did was the lace edge stitching, mentioned above. Pacing the lace on top of the fabric, stitching around the very edge of the block. Then giving a quick, low heat iron and trimming any excess lace off. Since the lace pieces were generally made a little larger then the blocks.
Now its time to make some quilt blocks, starting with the half square triangles. If you have never made half square triangles, before, the process to fairly simple. You mark the diagonal center line from one corner to the opposite corner, and sew down each side at a 1/4 inch, (if possible slightly less) from the line. Then cut the line and iron both pieces open. Next, it back to cutting board and trimming each block to exact size, well keeping the diagonal line centered.
After making all the half square triangles needed. I like to layout every block piece, where it will fit into the

block piece. This way, I can see what the block will look like and what order to sew each piece in.
In addition, since there are more then one of each block, I can pick which piece looks best on which block. So if all the lace pieces done have a flower on block A, and block B has has all flowers. I would exchange pieces so each block ended up with some flowers.
Once the blocks are arranged to my liking, I start the assembly process for each block. Sewing two 2 pieces together, ironing the pieces. Repeating this, until I have all the quilt blocks assembled and ready to add to the quilt
Assemble quilt
With all my blocks made and cut out, it was almost time to put the quilt top together. Just had to make a design choice.
How I want the lace border made.
There was 3 options.


Easiest option was to repeat the process of adding lace to the fabric and having sewn into the quilt.
Second option was to have the lace sewn into the quilt along 1 side, with the lace flowing over the seam on the other side
Lastly. it was to add the strip now, do all the quilting and then carefully place each lace piece, so it spills over the strip and on to the other blocks. With the added benefit, of base layer strip being completely covered in lace.
After laying out the options, taking pictures. Sending the pictures to "The Council". Which is my mom, her quilting friends and my husband. They all agreed that the last option was the best. So at least that task got pushed back a few days.
With that decided, it was time to assemble the quilt top.
Just like the quilt blocks, I laid out everything, to ensure i was happy with layout. Then sew the pieces together, in ever increasing size.
Sandwich time
After the whole quilt top is completed, and pressed. Its time for a sandwich.
Just not the food kind of sandwich. A quilt sandwich. Which is the 3 layers of a quilt.
The top, the batting, and the backing.
Laying the backing out flat on a surface, usually the floor, with the right side facing down. I then lay the batting on top, followed by the quilt top, with right side facing up.
I then fold back the quilt top about 10-12 inches, so I can spray the temporary adhesive on the batting and back of the quilt. Once sprayed the quilt top is folded back over, and smoothed flat.
I will then work from the opposite side of the quilt top, by pulling it up to the already glued part, spraying 10-12 inched, folding back down and smoothing again.
This whole process, of fold, spray, unfold, smooth, is repeated the whole length of the quilt top and then again for the backing.
For this project, I used extra adhesive, as I was going to breaking the quilting rule of working from the center out.
Creating a quilt sandwich that will hold together until its first wash.
Except its not time to wash the quilt, its time to do all the stitching called quilting, and binding. Plus for this quilt, its also means adding lace, beading, and more details.
Quilting
To get me toes wet, I started with the corner quilt blocks, with some edge stitch quilting around each lace
block piece. Which will help keep the lace flat and get the quilt sandwich holding together with more then just spray adhesive.

Next up was the border stitching, and since I love texture in my quilting. This was one of the spots I wanted to have that texture. I used my heat erase pen to mark one line of each panel that connect one corner to opposite corner, with next panel having its line starting at that corner going to the opposite cornet, creating arrows. I would stitch that whole line of heat erase marker line for the one side of the quilt. Working in sections, I line the edge of my 1/4' presser to the stitching from the heat erase stitching, at the edge of the quilt. Sew until I was 1/4" from the next line, and with needle down, lift the presser foot and turn the quilt. So the presser foot is lined up with the other heat erase stitching. Then sew along that line until the edge of the quilt. Then it needle down, pivot again, sew along the very edge of the quilt for 1/4". Needle down, Pivot, line presser foot with the stitching I just finished. Repeat, again and again and again.
Until the very end, where the is no more room to add another line of stitching. So that one sectional, or half of 2 panels have quilting.
And repeat for the next section, and the next. Until the entire border is quilted in 1/4" quilting.
Hearts
Taking a small break from quilting. it was time to add the 2 overlapping hearts in the center. Since I cant draw to prefect hearts, I used my Cricut and some legal size printer paper, to cut out 2 half hearts and tape then to be one heart. It had to be half hear, as I need hearts that were over 12" wide and tall.

The first heart as made from some organza fabric from my one of my dresses. I traced the heart on to the organza fabric, using heat erase chalk. Starting at the bottom tip, I folded the organza fabric in, sewing along the chalk, I stitched that entire heart , then cut the organza heart out of the big piece of organza.
Not going to lie, this was a real, "maybe this will work, and if doesn't maybe I will get a better idea" move.
Lucky for me, it worked. Then after ironing away the chalk line, it was placing that heart to quilt, well using the paper heart as stand in for the other heart. After getting the organza heart where it would look the best, it was pinned and sewed onto the quilt.
Next up was the veil heart. Which, you may of guessed, was made with my veil. Using a heat erase pen again, i traced the paper heart, where this heart was going to be. Found the center back of veil, and placed that at the bottom tip of the heart. Do to the delicate lace work and beads, I hand stitched the veil edge along the heat erase pen outline. First on the out edge and then again along the inner edge of the lace work.
After the edge of the heart was complete, it was time to handle the center. I had to trim the tulle from my veil, so it would all gather in the center of the heart. Which I did a running stitch along the cut edge of the tulle, and did gather it and put a couple stitching into the quilt, so it would not move.

Now Bling time! The big applique piece from my wedding dress was placed, and pinned in the center of
veil heart. I did hand stitched around the edge and in some locations inside the applique. I also hand stitched some extra veil edge pieces on the inside of the heart.
However I did grab some of E600 Fabric fuse glue and pushed that in-between the stones, beads and ally anywhere I could, to make sure that piece would not fall out of place. I also used the glue along the edge of the heart and the other veil pieces inside.
As I am writing this, after completing the whole quilt. I really wished I had waited to the end to add the applique piece. As the stones, and everything has ended up shredding all the delicate tulle from the veil. The edge pieced that were sewn and then glued are safe, but the little gathering and that candy box effect is lost.
More Quilting
Back to the sewing machine for more quilting fun. I really wanted more of that heavy texture quilting, ad the center panel with 2 hearts seem like the best place to have all that stitch work around that open space.
The process of doing the stitch work is very similar doing the work around the border. I stitched around the 2 hearts with my 1/4 presser foot next to the edge of the hearts. the big difference, is the first couple times I stitched around the hearts, I didn't reach the edges of the panel. So each of the stiches had to be stopped, and a whole new line of stitch had to be started,. not connected to the other ones.
After doing all of that quilting, I still had one section of the quilt left to do some quilting. The inner line of fabric with lines of satin and glitter tulle. Definite wanted to keep this much simpler and with alot less stitch work. So I just edged stitched around every piece of fabric, it the whole section. So that using the inside of the presser foot leg, along the edge of seam. So for each pinwheel block, I stitched around each of the 8 triangles. Then for of the 3 lines of fabric blocks the stitching went along each side the seam.
Lace
To recall the council meeting, where it was decide to have the lace applique added to the border so it flows over both side the strip of fabric. Well its finally time to make that happen.
The first step was to grab a comfy chair, a sharp pair of snips and start cutting out each piece of lace applique.

Laying out the quilt on the floor, well blocking that area off, so the dog, & family wont walk on the quilt, it was time to lay out all the lace appliqué on to the area. Starting with the biggest pieces of lace first, I laid them on the strip of fabric. and then used smaller lace pieces to fill in the strip more. Working to smaller and smaller and pieces of lace, until there was no or at least very little of the fabric below showing.
After using nearly all the lace applique, I grabbed some liquid stitch, and had to begin glue every piece of the lace down. I would carefully pick up a piece of lace, spread the liquid stitch on the strip of fabric, and then pat the lace into the strip, so the liquid stitch works into the lace. After going around the whole quilt, and going over again to double check that ever piece is glued down.
After leaving the liquid stitch fora couple days to completely dry, it was time to stitch the lace edges down to the quilt. I gathered my family, and had them watch me pick up the quilt. So if any lace piece came loose, they could tell me where is came from. Lucky for me, that no pieces came off.
Edging stitching again, along the lace pieces that flow over that strip of fabric, for both side of the strip iof fabric. Which was a lot of getting to the edge of the lace, needle down and pivoting ever so slightly, so the sewing can carry on along the edge of the lace. This would sometimes be a couple stitches, and then pivoting, stitching a few more and pivoting again.
With both borders edge stitching down, and I rally wanting to make sure that this would never fall apart. I then stitched don the center of the strip of fabric, thru all the lace. And then did two more lines of stitching, each one was between the center stitch line and he border of the strip of fabric. This should, make every lace piece firmly in place, with liquid stitch and some sewing.
The last lace pieces to be put on the quilt was the glitter lace trim that was on the panel of center panel. I didn't plan, for the points of the trim to match of with the quilt blocks, but to my shock they did. I still

found that circle parts need the circle cut off the trim and then placed on top of the trim. for everything to lay flat. I used liquid stitch again, on the circle pieces. As I had the container open, and it was late at night, so I was heading to bed, with work the next day. So the glue had time to dry, before I would be sewing down the trim.
After getting my beauty sleep, and a day off hard work. I pinned the rest of the trim in place, so it wont not shift as i moved the quilt to the machine, or as a sewed th trim in place. The trim was sewed onto the quilt with edge stitching, along both sides of the trim, and around each circle.
Binding the quilt
With all only binding left for machine sewing left, I decide to get that part down before tackling the remaining hand.sewing details.

Starting with trimming off the excess backing and batting from the quilt in a process called squaring the quilt. I grab make long 24" ruler, so I can cut off the excess material and make the sides of the quilt super straight. This sometime results in a little bit of the quilt top getting cut off as well, but if its a tiny bit and the side will be overall straighter , its perfectly acceptable. I do pay extra attention to the corners, as I aim for prefect 90 degree corners, but if they are 88-92 degree corners, no one is really going to know.
If you have ever checked out my blog post on binding quilts, you know there is options to pick from. For

this one I went with first method, as I want the most control over the binding. Due the fabric used for the binding being from my wedding dress and it was not usual 100% quilting cotton fabric i normally use
Finishing Details
Finally at the home stretch, and the quilt looks like a quilt should be looking. I just have 2 hand stitching details left to add.
The first detail to add is some beading along the edge f the organza heart that was stitched on during the quilting steps. At first I wanted to line the edge with he covered buttons and pearl like beads from my dress. However I found that I only had about 10 buttons and about 5 beads.
So I made the decision to grab some beads that would could be similar to pearl beads. Except when I went to the craft store, I forgot to bring the beads to compare, so ended up with beads that were bigger. Oh and I also found to crystal beads that sparkled so pretty, and grabbed them as well.
Now armed with my buttons, new bigger pearl beads and some sparkle sparkle. I roughly placed the buttons & beads round the heart, made a pattern,
Button - 2 pearl beads, 1 sparkle bead, 2 pearl beads, 1 sparkle, 2 pearl - repeated.

The whole way around the heart. each bead section was strung on thread, and then sewn down before adding the button. I then take a second piece of thread on looped and sewn in between each bead. Just in case the strung thru thread ever failed, the whole line would not come loose.
Which leads to a story, that is now kinda funny, after enough has pasted.
After the whole quilt was completed, I had it laid out on the floor, and my son had his friends over.
I forgot to pick the quilt, and a one rowdy Nerf wars later. About 2 beads fell off.
So my extra loop of stitching really saved my butt, and the beads were resewn back in, with some extra stitching this time.
On to the last detail.
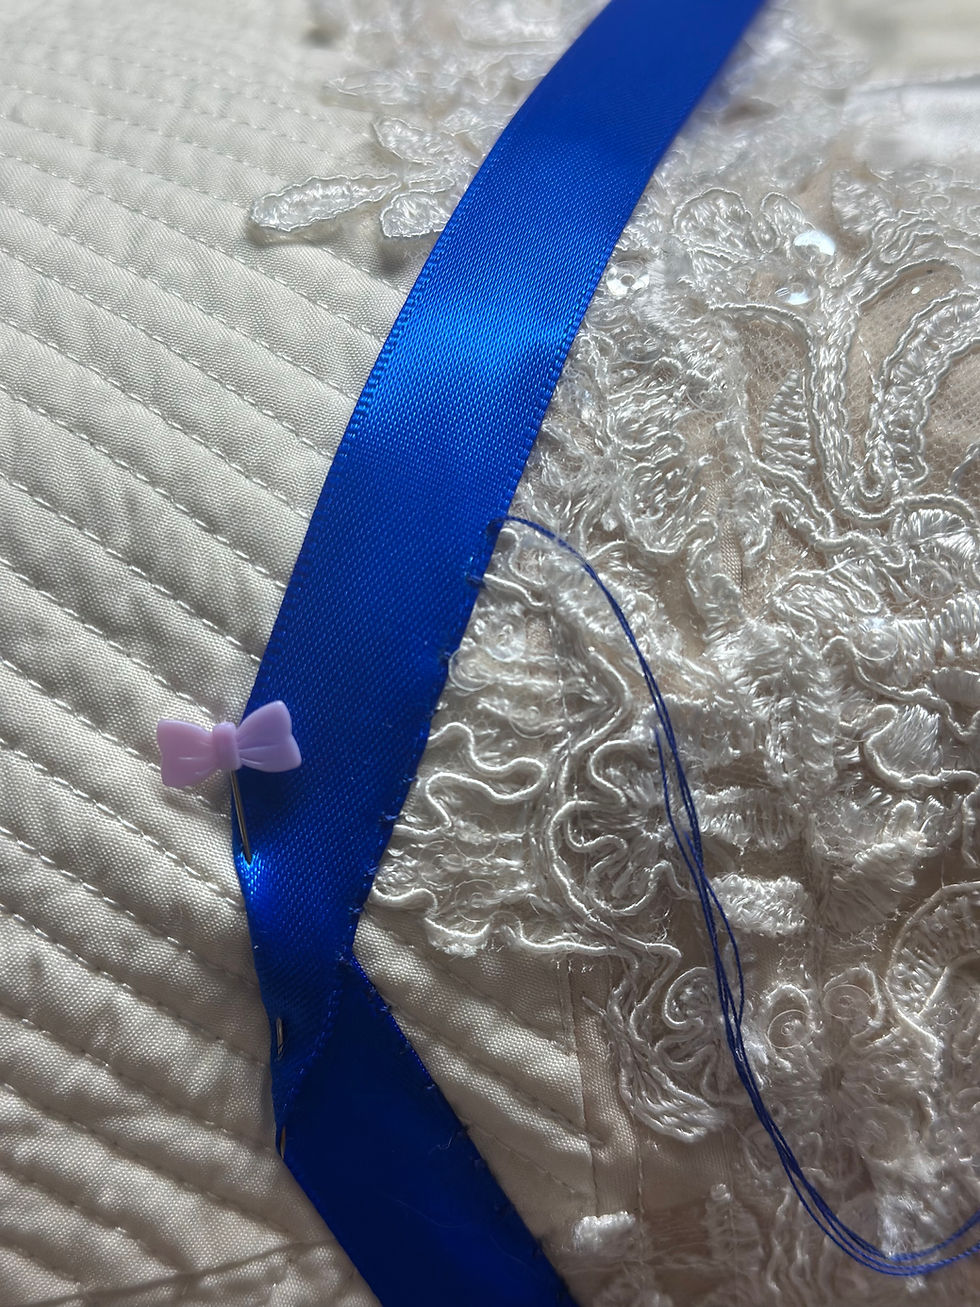
Which I saved till last as it was new colour. Yes its finally time to add the something blue. I wish there was a fancy way off place the ribbon on a quilt. However I just kinda dropped the ribbon, and fussed around a bit till I was happy. After that I pinned it down, enough to hold in place, well I hand stitch the ribbon on the quilt.
With the last little blue stitch, the Wedding Dress Quilt is Done


Comments