Wedding Dress Robe
- Jennifer Herron
- Jan 1
- 4 min read
Updated: Feb 10
So my wedding dress from 2015, has been stuffed into a moving box, shortly after my wedding. I always say "One day, I will do something with it. just not sure what yet"
So after my 10 year wedding anniversary with renewal of vows, I had 2 wedding dress, and a Notes app full of ideas.
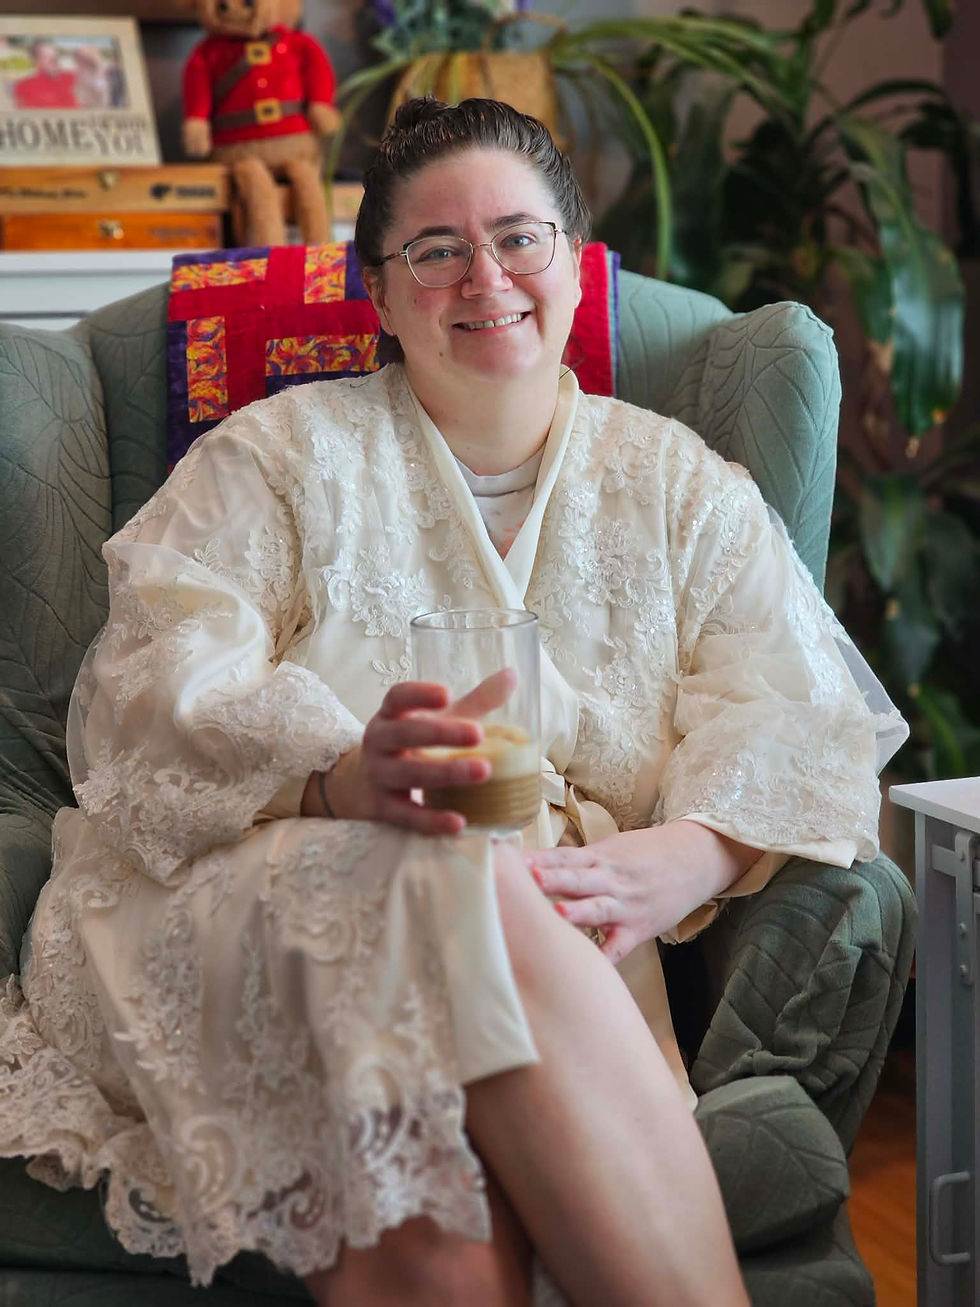
One of my first ideas was to make a Robe, (or housecoat) with a cute Pajama set.
I found some cute patterns at Mood Fabrics. Printed those, and got to work.
Testing Patterns
So after printing the patterns and taping them all together. I decided to do a mock up of the patterns.
As according to the measurements of both patterns, I am one size, with some measurements, but another size with the next measurements.
I used the larger size and made the mock up out of some old Star War sheets.
What did the mock up tell me,
Completely scrapped the cute Pajama set. It was not flattering on me.
The robe can be made in the smaller size
Adjust the size of sleeve opening to a bit smaller.
Shorten the robe
Adjust Pattern
There was 2 adjustments made of the robe pattern.
Smaller sleeve opening and shorten the robe.
The sleeve was done by marking the bottom part where i wanted the new opening to be, about 1 inch smaller (2 inches smaller once cut) and then drawing a line from there to the start of the arm length. (the armpit)
The shortening of the robe was made by cutting off some length off the bottom of the pattern. With of course remembering to still keep a couple inched for hemming
I also marked where the final hem would be, so the lace tulle overlay would fall just a tiny bit longer.
Prepping the Fabric

Normally prepping fabric, is maybe pre-washing, ironing flat and then cutting the pattern.
However with a wedding dress, the first step is taking apart the dress, to free the fabric needed.
In this case, the lace tulle overlay and the satin underneath that.
I did take the time to get off the other details, and place them aside for future projects.

Next up is to wash fabric being used. Especially since it was not cleaned after the wedding in 2015.
So in the laundry tub, with some gentle soap to get the general dirt out. Plus a laundry soap bar, along the whole hem of the dress to really get the dirt off the hem.
After hanging to dry, and ironing the satin, it was finally time to make the robe!!
Cutting out the pattern pieces

So every piece that has the lace tulle overlay, has to be cut again in satin.
That's where I started, with the satin pieces. As there was less fussy cuts and more keeping everything going the same way. One issue came up, was that i needed a tiny bit more fabric for the neck edge piece. Which I used the lining satin more.
Next was the lace overlay pieces, to which i wanted bottom edge to be featured at the bottom of the robe and sleeves. So there was some extra time spent placing a pattern piece, triple checking i would have enough lace edge for the others.
Which I have learned after cutting all the pieces, that bottom detail on the dress was sewn on, using invincible thread. I could of removed it, and then resewn on to my robe after making it.
Sewing
Since the stain pattern pieces were cut from a dress, there is still the seams from that dresses patterning in the middle of my pattern pieces. These seams were not ever finishing, as there never meant to be touched, being top of all the tulle, and lining layers of a dress.

First step in sewing is "reverse sewing". Where I had to take the seam apart, then re stitch it back to place with a french seam. So no raw edges would be visible and safety stored away.
After all that was done to every single pattern pieces, I had to add the lace tulle overlay to its matching satin pattern piece, by edge stitching along each edge.
After that, pattern pieces were finally ready to begin sewing together and assembling the robe.
The pattern on Mood Fabric, has amazing directions, so I wont go into detail on how to make the robe from here, as I followed the pattern directions. I did french seam everything, as I wanted to make the robe last thru many years of wear.
I did change the hem on the robe, to a 2 inch double fold over hem, as I just like my hems with the same inside fold over.
With the same hem on the sleeves, but 1 inch double fold over hem.

The last step was the belt loops. Which I had put the completed robe on, tied the waist belt on, and had someone mark with some pins, where the belt was mid back, and on the side seams. From which I adjusted, if needed to be equal all the around, and then sewed the on. I prefer to add my loops like this, when possible. As patterns are drawn with "this works form most people", which is great. However, if the person who is wearing the garment can have loops placing where they like, it makes it a bit more custom
Things I would do different

Now that the project is finished, I always like to review my work and decide what things I would change, if I would do it again.
The biggest change, I would make is bottom edge. I wanted to use the bottom edge of the dress for the bottom of the hem and the hem of the sleeves. I had just cut them out as part of the pattern cutting.
I realized later the bottom hem part was stitched on with tiny invincible thread stitches.
I could of carefully removed this trim, and then resewn it on the actual bottom of my robe.
This would allow the hem to be one continuous piece, with no weird seams.
Want more Wedding Dress projects, checkout my Recap, that has all projects made


Comments