Witch's Hat
- Jennifer Herron
- Oct 1, 2025
- 6 min read
Halloween is finally coming, and this cute witch's hat was all over my Pinterest feed. So I thought, why not make one (or three).
After printing the pattern (click here for your copy)
The pattern is not mine, and instead of drawing out my own, I thought this would be easier.
Supplies
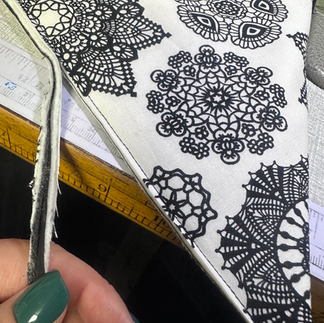
fabric - about 1 meter
Batting or interfacing - about 1/2 meter
Thread
Clear tape
Paper scissors
You will of coursed need pins, sewing machine, scissors, etc. But I figure you may already have those.
Printing and assemble the pattern

When printing your patterns, is best to have the print set to 100% or actual size. You want the pattern to print to correct scale, or the pattern wont be true to size and/or you wont be able to tape it together
After print is assembling the pattern. Most pattern have a bit over hang on all sides. You can either fold over or cut off the overhang on one side. With folding over, you can always refold if you mess up. Great for someone who is new, the pattern is a lot of pages, or was expensive.
Cutting off the edges, requires a rotary cutter only used on paper.
I prefer to do either method, one page at a time and slowly build out my pattern sheet.
With each page, I also tape where the pattern cut line meet, with over hang each way, and if the piece is large, maybe a piece a of tape in the middle.

I don't like adding a large piece of tape along the whole edge, as its harder to control the tape and keep paper from shifting. I will however use
masking tape on the back of the paper, after cutting everything out.
After getting all the all the pages assembles, I will cut the pattern pieces out.
For this pattern its a one size, so just on the cut edges.
If the pattern had multiple sizes, I cut the largest size. Unless I know for sure, I need a certain size and have good idea that I wont be using pattern again in the next few years.
Cutting pattern
So this pattern is really easy. It doesn't have a straight of grain, and its for a woven fabric like 100$ quilting cotton. So positioning the fabric is a lot more care free then other patterns.
There is just one tiny detail to remember. For the brim, you will see a seam allowance of the flat edges, with arrows for fold edge. So you will either fold the fabric or not.
Cutting on the fold. - fold you fabric, place the flat black edge on the fold - Cut 2 brim pieces and
1 Interfacing/Batting piece
Cutting not on fold - place pattern on the fabric - Cut 4 Brim pieces and 2 Interfacing/Batting pieces.
You will need the then sewing the pieces together, with the 1/2 inch seam allowance.
Sewing
I will attempt, I did even watch the video, or follow the instructions provided. So look at those when you download pattern, and its different.
Step one - Making sandwiches
Brim Pieces
Start by placing your batting/interfacing section down, then the wrong side of the lining fabric on the batting layer, (*see note for iron on below) - Next place the main fabric, right side together with the lining.
Please line up edges of each layer, the outer edge lining up is important here.

Cone pieces
Place lining fabric, right side down on table, next add the interfacing/batting layer, (* see note for iron on below) - Next add main fabric, with right side up.
*Please note, if your interfacing is an iron on type - This is the point where you iron the interfacing to the lining
Sewing Brim

Sew along the outer circle with a 1/2 inch seam allowance. Once done, clip the seam allowance every 1-2 inches. Please take care not to clip them seam. I generally aim for 3/4 of the seam allowance, giving that extra space so I don't touch the seam.
Iron the main fabric side the seam, not the batting/interfacing side.
Turn the brim right side out, so the batting is now the inside the sandwich, and lining and main fabric have the right sides out.
I added an edge stitch to my lining edge, which you don't have to do, but you can. If you do, it a stitch that is at the very edge of the seam, that has the lining fabric, batting and the seam allowance. you don't want to touch the main fabric. This will help keep the lining fabric from shifting to the main side.
Next up is ironing again, getting the brim flat, pushing iron from the outer edge to the inner edge, so the ling, main and batting layers, all line up (more or less).
Use a serger to finish the seam now. If you done have a serger, finish the edge however you normally would.
Sewing the Cone - With French Seam
(I have included some instruction for not french seamed, below)
Its not needed, but you can do a edge basting stitch around the whole cone, this will just help hold everything for you.
I chose to french seam the cone, which just allowed the seam along the cone to be hidden better (in my opinion). If you have never done a french seam, it really not hard, but I can understand if you choose not use if for this project.
Sew the 2 flat sides of the pattern, lining sides together, at 1/4 inch seam allowance.
Trim the seam allowance in half, and at the point a bit more, without trimming the seam.
Iron the seam, then turn it over so the main fabrics are together. Ensure that you really take the time to get the point turn fully out. Iron the seam again, if you wish.
Sew again at 1/4" along the edge, with main fabric together.
Turn out again, so the main fabric is on the outside, the lining fabric and the enclosed seam allowance is on the inside. Getting the point to be pointy, will take a minute to work the point thru the seam bulk.
Serger the edge cone, to seal everything,


Sewing cone - No French seam
So start by using your serger to go over all the edges of the cone sandwich, to finish the edges.
Sew the 2 flat sided of the pattern, main fabric sides together, at the 1/2 inch seam allowance
Press the seam, and if need trim the point edges (If you trim the edge, you will need to re serger that spot)
Then turn the cone right side out, so the main fabric is facing out.
Attaching Brim & Cone

Using pins or clips, attached the brim inner edge to the edge of the cone. Main fabric together.
There maybe a bit of slack at the very edge, so just work it evenly around the seam.
Sew the pieces together at a 1/2 seam allowance. The slack will disppear into the seam, as the excess only exists at the edge, not at the seam area.
Next up is edge stitch the seam allowance to the cone part of the hat.
You can do this with 1 edge stitch and be done. You wil see the seams, but the hat will function.

I choose the do the one edge stitch, will also sewing done some twill tape. (this could be a 1/2 ribbon too)
then doing an additional stitch along the twill other edge, to encase the seams. This will tidy up the inside of the hat, but leave 2 rows of stitching on the out side.
Done (or move on to extra decor)
So at the point you have yourself a Witch's hat.
You can call it a day and love that hat as is.
Or you may choose to add to the hat. Maybe some tulle along the base, maybe a bow or spiders crawling all over. The possibilities are endless, and really up to you.
Please feel free to share your creations, Love seeing everyone's work.

Comments